BookStack Hosting
Guide how to setup BootStack on METANET webhosting
Plesk Preparations
Create a SSH account
Create an SSH account before you try to connect. Go to your domain and click on Webhosting Access:
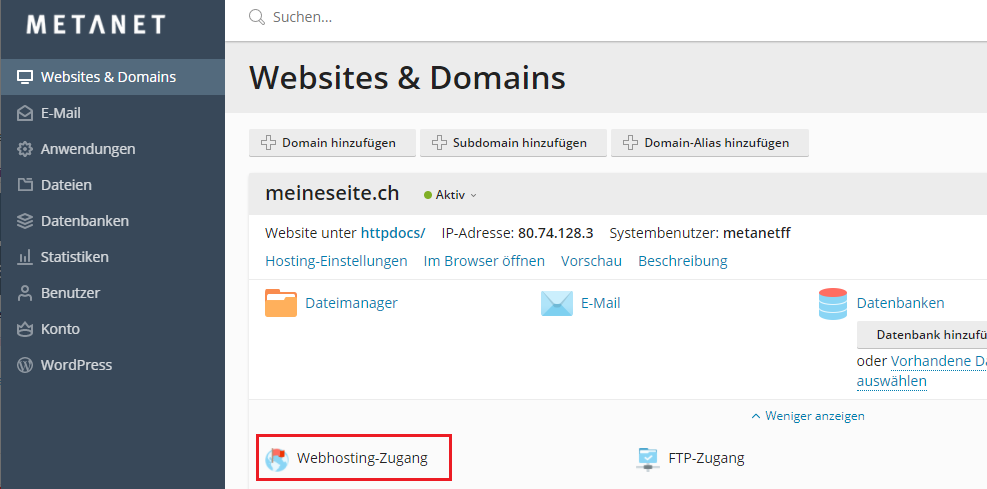
There you can define a user or use your existing login to connect via SSH.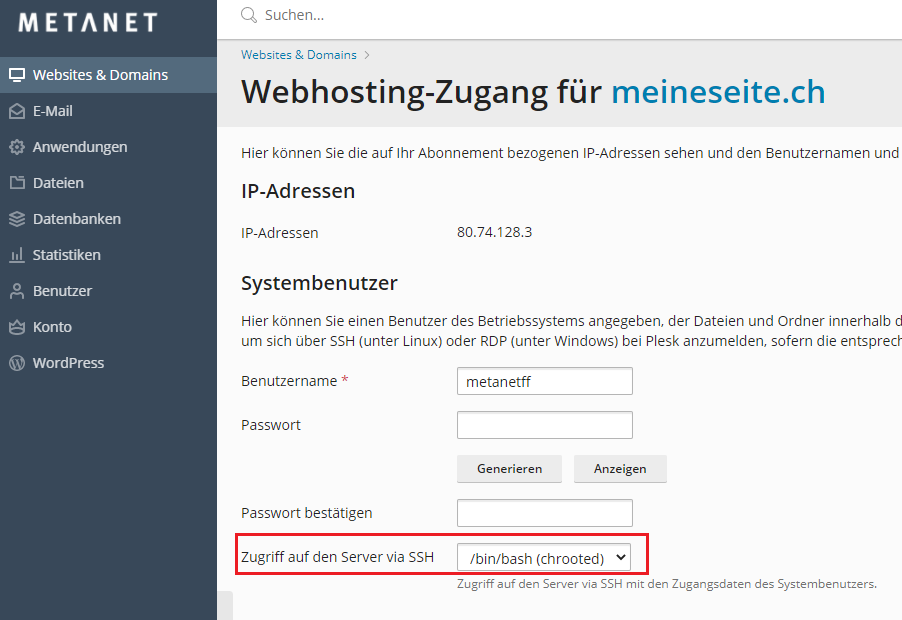
To connect via SSH you need to connect through port 2121.
ssh username@yourwebsite.com -p2121
Check for PHP version
Check the PHP version. It can be that it's a lower version than showing on the Control panel. This because the linux alias "php" is directing to the older version. Make sure your PHP is running minimum 7.4 or above.
https://www.metanet.ch/support/713#10224-php
php --version
If your version is below 7.4 do the following:
alias php='/opt/php80/bin/php'
echo "alias php='/opt/php80/bin/php'" >> ~/.bash_profileexport PATH=/opt/php80/bin:$PATH
echo "export PATH=/opt/php80/bin:\$PATH" >> ~/.bash_profile
After that check the php version again in the command line.
Create Database
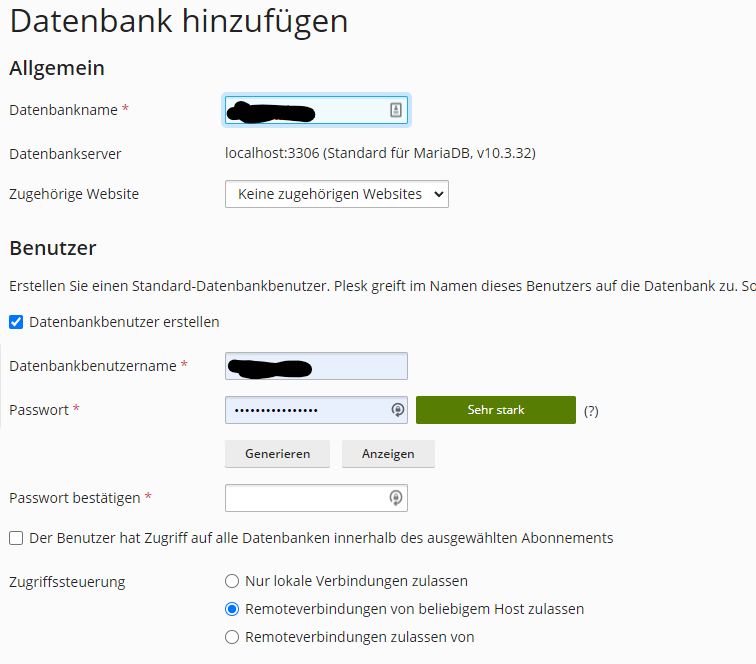
Before you install BookStack you need to make sure you have already a database created.
Use the MySQL Database Wizard to create a database and database user with all privileges to the database you’ve created. Take note of the full database name and user credentials for a later step.
BookStack Installation
SSH into your cPanel server using your login credentials.
Make sure you are in your home directory by running cd ~
Clone the release branch of the BookStack GitHub repository by runninggit clone https://github.com/BookStackApp/BookStack.git --branch release --single-branch.
It will create a BookStack directory for you automatically.
Run cd BookStack to get into the application folder and then run composer install. It will take a few minutes to download all of the required packages.
Run cp .env.example .env to start your environment configuration file.
Run php artisan key:generate and confirm with a “yes” to generate a unique application key. This automatically updates the APP_KEY constant in your .env file.
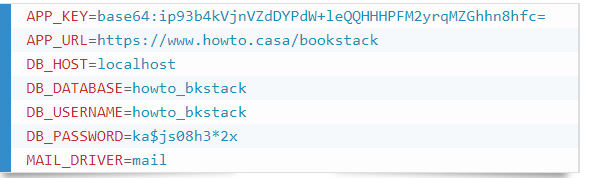
Run nano .env and fill it with your database details from step 2; set the APP_URL to the expected full public-facing URL of your BookStack site; set your mail details; save and exit the editor.
Run php artisan migrate and confirm with a “yes” to prepare the database.
Run chmod u+w ~/BookStack/storage ~/BookStack/bootstrap/cache to ensure these folders are writable by the web server.
Final step is to make sure that the Document Root directory is pointing to your BookStack folder:
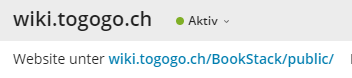
Done! You can now navigate to your public-facing BookStack URL and login using the default admin details, admin@admin.com with a password of password. For security reasons, change these details immediately after logging in for the first time.
URLs
https://www.warpconduit.net/2019/11/16/installing-bookstack-wiki-on-cpanel-shared-hosting/
https://www.bookstackapp.com/docs/admin/installation/
https://www.metanet.ch/support/713
https://www.metanet.ch/support/713#10224-php