Scanning
Collection of ways to scan a network or directories
GoBuster
GoBuster scans the most common directories which are used on a WebApp / Website. To run this scan GoBuster needs to be installed first: sudo apt-get install gobuster
Once GoBuster is installed we can run it as following:
sudo gobuster dir -u http://<ip>:<port> -w /usr/share/wordlist/dirbuster/ -x php,sh.txt,cgi,html,js,css,py
| GoBuster flag | Description |
| -e | Print the full URLs in your console |
| -u | The target URL |
| -w | Path to your wordlist |
| -U and -P | Username and Password for Basic Auth |
| -p <x> | Proxy to use for requests |
| -c <http cookies> | Specify a cookie for simulating your auth |
https://tools.kali.org/web-applications/gobuster
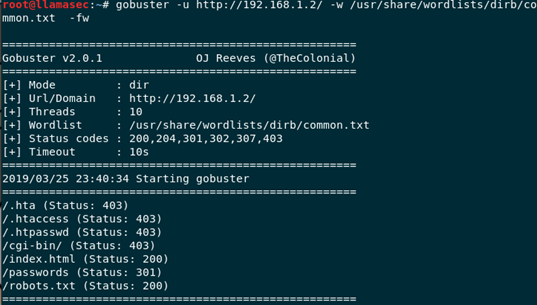
After the run you see something like that:
Enum4Linux
Enum4linux is a tool for enumerating information from Windows and Samba systems and is capable of discovering the following:
- Password policies on target
- The operating system of a remote target
- Shares on a device (drives and folders)
- User listings
- Domain and group membership
Enum4linux is already installed on kali.
https://tools.kali.org/information-gathering/enum4linux
To run enum you need to execute the command like that:
sudo enum4linux -a <ip-address> | tee <outputfile>.log
With this command you export the results into the defined output file. Makes it easier to analyze.
It takes some time to see all results ca. 5 minutes.
To see all possible actions you do: enum4linux -h
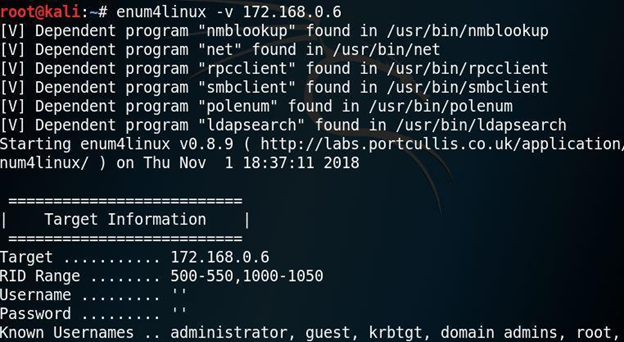
During the execution you will see everything what gets scanned:
FTP & SAMBA
FTP
Sometimes anonymous login is allowed on a FTP server.
ftp <server/ip>
During the login you'll get asked to provide a user name and ther you just enter: anonymous
SAMBA
Access without username or password
There are also some cases where you are allowed to login to an Samba share without username or password. To perform this follow these steps:
smbclient //host/share -U %
OR
smbclient //host/share -U " "%" "
Access with password
If you were able to get a password you cann access the SAMBA share like this:
smbclient //host/share
Then you'll get asked to enter the password.
Download the whole Share
You can download the whole samba share with following command:
smbget –R smb://<ip>/<sharename>
Everything which is stored on the specified share will get downloaded.
Nessus
Nessus vulnerability scanner is exactly what you think is it’s! A vulnerability scanner!
It uses techniques similar to Nmap to find and report vulnerabilities, which are then, presented in a nice GUI for us to look at.
Nessus is different from other scanners as it doesn't make assumptions when scanning, like assuming the web application is running on port 80 for instance.
Installation on Kali
- Goto https://www.tenable.com/products/nessus/nessus-essentials and register an account.
- Download the Nessus-X.XX.X-debian6_amd64.deb
- Depends which OS you are using
- Navigate to the directory where it was downloaded
- Run following command: sudo dpkg –I Nessus-X.XX.X-debian6_amd64.deb
- Once it’s installed start the service: sudo /bin/systemctl start nessusd.service
- Open https://localhost:8834 in the browser. Accept the risk alert and continue.
- On the welcome screen select Nessus Essentials
- If you already have an account you can skip the account creation.
- Now enter the activation code which you received via email.
- Create a user account.
- Nessus will start now downloading the plugins. This takes some time check that you have enough space!
- After the plugins were downloaded you can log in with your recently created user account.
Usage
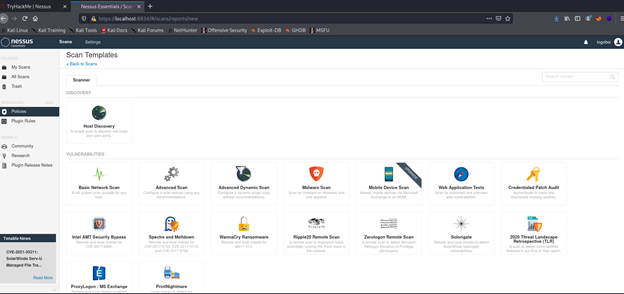
As soon Nessus is installed you can enter the Web-UI. In general it’s simple to create scans as there are many prepared templates. In each scan you can set different parameters to adjust the scan.
Nikto
Nikto
Nikto is a perl based security testing tool and this means it will run on most operating systems with the necessary Perl interpreter installed. We will guide you through using it on Ubuntu Linux, basically because it is our operating system of choice and it just works. Perl comes already installed in Ubuntu. So it is a matter of downloading the tool, unpacking it and running the command with the necessary options. For Windows users running Nikto will involve installing a perl environment (activestate perl) or loading up a Linux virtual machine using Virtualbox or VMware.
Installation
The installation is straight forward:
sudo apt install nikto -y
If there are any errors regarding SSL support it may be necessary to apt install libnet-ssleay-perl. Without SSL/TLS support you will not be able to test sites over HTTPS.
https://hackertarget.com/nikto-tutorial/
Usage
Getting started
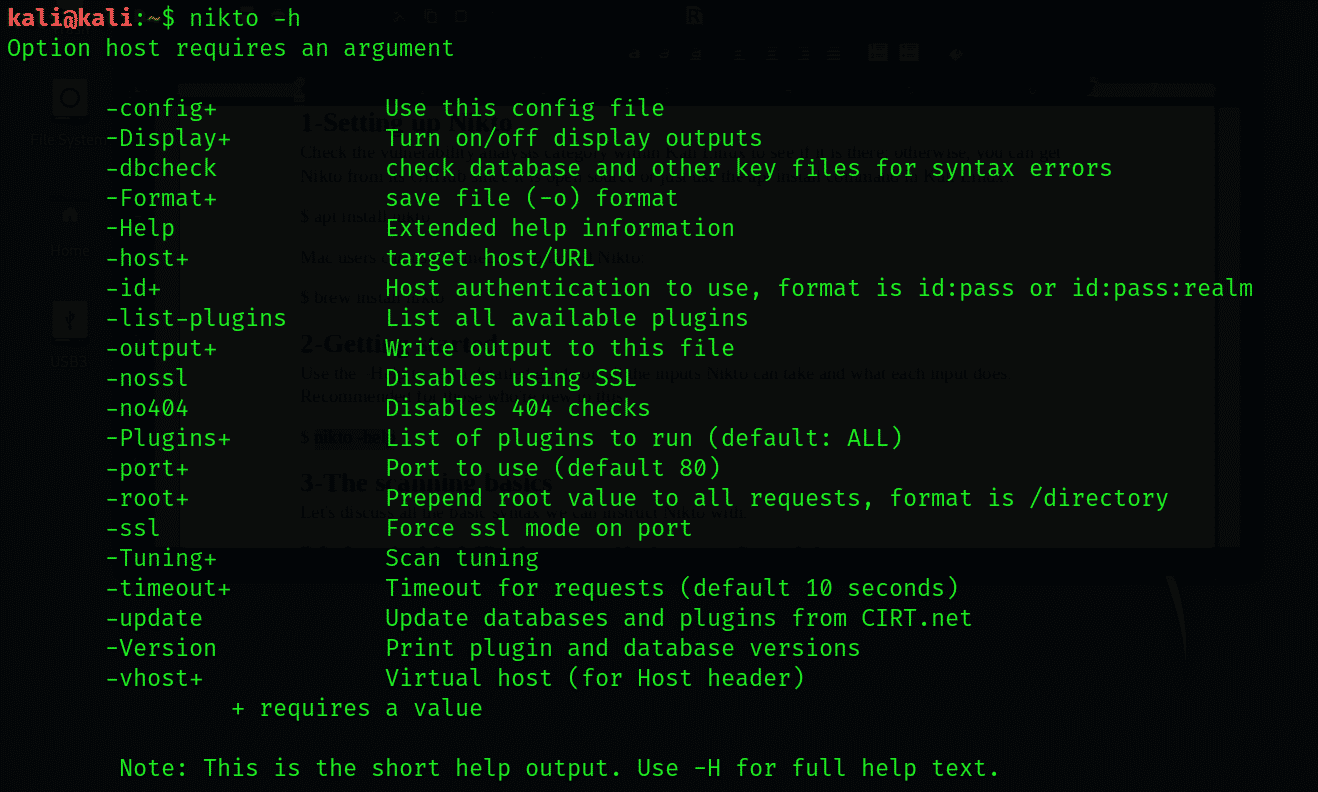
Use the –Help to see a detailed guide on all the inputs Nikto can take and what each input does. Recommended for those who’re new to this.
nikto -help
Basics
Substitute the default IP or hostname with a hostname of your choice:
nikto -h linuxhint.com
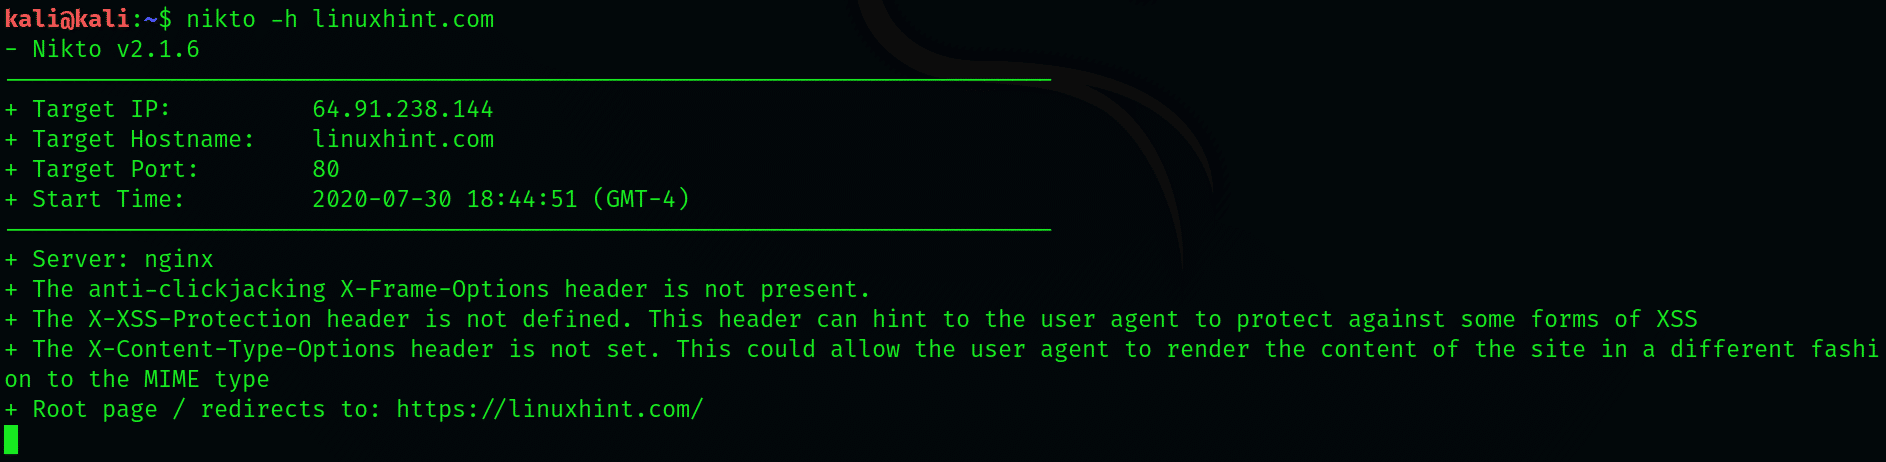
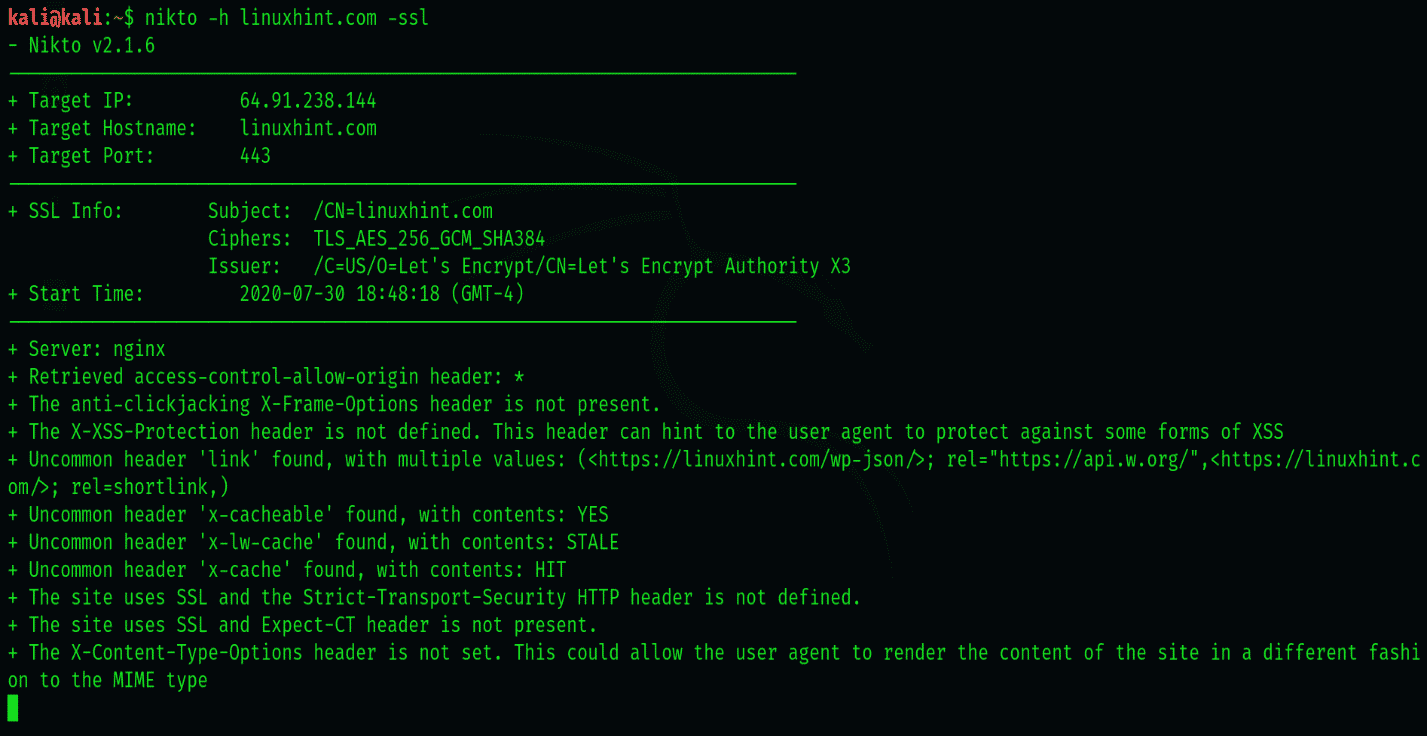
We can perform a basic scan to look for port 443 and SSL, which has widespread use in HTTP websites. Although Nikto doesn’t need you to specify the type, specifying helps Nikto save some time with scanning.
To specify an SSL website, use the following syntax
nikto -h linuxhint.com -ssl
Server List
Nikto can scan a list of servers as well.
nikto -h targetIP.txt
NMAP
NMAP in general
NMAP is a free open source “Network Mapper” for network exploration or security auditing. You define an IP address which you want to scan and NMAP will list you all open accessible ports and more. This tool has so many options to scan an environment I will list the most common and useful.
Additionally I explain the most important ones.
Scan Types
When port scanning with Nmap, there are three basic scan types. These are:
- TCP Connect Scans (-sT)
- SYN "Half-open" Scans (-sS)
- UDP Scans (-sU)
Additionally there are several less common port scan types, some of which we will also cover. These are:
- TCP Null Scans (-sN)
- TCP FIN Scans (-sF)
- TCP Xmas Scans (-sX)
Most of these (with the exception of UDP scans) are used for very similar purposes, however, the way that they work differs between each scan.
TCP Scan
To understand TCP Connect scans (-sT), it's important that you're comfortable with the TCP three-way handshake.
In other words, if Nmap sends a TCP request with the SYN flag set to a closed port, the target server will respond with a TCP packet with the RST (Reset) flag set. By this response, Nmap can establish that the port is closed.
If, however, the request is sent to an open port, the target will respond with a TCP packet with the SYN/ACK flags set. Nmap then marks this port as being open (and completes the handshake by sending back a TCP packet with ACK set).
Many firewalls are configured to simply drop incoming packets. Nmap sends a TCP SYN request, and receives nothing back. This indicates that the port is being protected by a firewall and thus the port is considered to be filtered.
SYN Scan
As with TCP scans, SYN scans (-sS) are used to scan the TCP port-range of a target or targets; however, the two scan types work slightly differently. SYN scans are sometimes referred to as "Half-open" scans, or "Stealth" scans.
They require sudo permissions in order to work correctly in Linux. This is because SYN scans require the ability to create raw packets (as opposed to the full TCP handshake), which is a privilege only the root user has by default.
If a port is closed then the server responds with a RST TCP packet. If the port is filtered by a firewall then the TCP SYN packet is either dropped, or spoofed with a TCP reset.
UDP Scan
Unlike TCP, UDP connections are stateless. This means that, rather than initiating a connection with a back-and-forth "handshake", UDP connections rely on sending packets to a target port and essentially hoping that they make it.
When a packet is sent to an open UDP port, there should be no response. Nmap refers to the port as being open|filtered. In other words, it suspects that the port is open, but it could be firewalled.
UDP scans tend to be incredibly slow in comparison to the various TCP scans. For this reason it's usually good practice to run an Nmap scan with --top-ports <number> enabled.
NULL, FIN and XMAS Scan
As the name suggests, NULL scans (-sN) are when the TCP request is sent with no flags set at all. As per the RFC, the target host should respond with a RST if the port is closed.
FIN scans (-sF) work in an almost identical fashion; however, instead of sending a completely empty packet, a request is sent with the FIN flag (usually used to gracefully close an active connection). Once again, Nmap expects a RST if the port is closed.
As with the other two scans in this class, Xmas scans (-sX) send a malformed TCP packet and expects a RST response for closed ports. It's referred to as an xmas scan as the flags that it sets (PSH, URG and FIN) give it the appearance of a blinking christmas tree when viewed as a packet capture in Wireshark.
The expected response for open ports with these scans is also identical, and is very similar to that of a UDP scan. If the port is open then there is no response to the malformed packet.
Common Scans
The most common commands are following:
nmap –sV <ip.of.vic.tim>
nmap –v -A <ip.of.vic.tim>
sudo nmap -sV -sC --script vuln -oN <outfile> <ip.of.vic.tim>
There are a lot more commands which are very powerful:
https://securitytrails.com/blog/top-15-nmap-commands-to-scan-remote-hosts
SAMBA Enumeration with NMAP
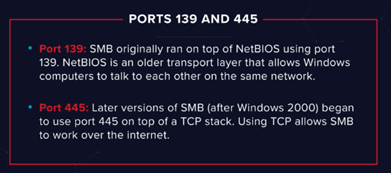
During the scanning process you will check for the samba shares. NMAP is a very helpful tool.
nmap -p 445 --script=smb-enum-shares.nse,smb-enum-users.nse MACHINE_IP
This command will list you up all available shares in the target network with additional information as Workgroup, User and so on.
When you don’t have success try to check another port.
To connect to a SMB share you type following:
smbclient //ip/folder
Create a MAP of the network
On first connection to a target network in a black box assignment, our first objective is to obtain a "map" of the network structure -- or, in other words, we want to see which IP addresses contain active hosts, and which do not.
To perform a ping sweep, we use the -sn switch in conjunction with IP ranges which can be specified with either a hyphen or CIDR notation. i.e. we could scan the 192.168.0.x network using:
nmap -sn 192.168.0.1-254
OR
nmap -sn 192.168.0.0/24
NSE Scripts
The Nmap Scripting Engine (NSE) is an incredibly powerful addition to Nmap, extending its functionality quite considerably.
There are many categories available. Some useful categories include:
- safe:- Won't affect the target
- intrusive:- Not safe: likely to affect the target
- vuln:- Scan for vulnerabilities
- exploit:- Attempt to exploit a vulnerability
- auth:- Attempt to bypass authentication for running services (e.g. Log into an FTP server anonymously)
- brute:- Attempt to bruteforce credentials for running services
- discovery:- Attempt to query running services for further information about the network (e.g. query an SNMP server).
A more exhaustive list can be found here.
Working with NSE Scripts
The --script switch to activate NSE scripts from the vuln category using --script=vuln. It should come as no surprise that the other categories work in exactly the same way.
If the command --script=safe is run, then any applicable safe scripts will be run against the target (Note: only scripts which target an active service will be activated).
To run a specific script, we would use
--script=<script-name> , e.g. --script=http-fileupload-exploiter
Multiple scripts can be run simultaneously in this fashion by separating them by a comma. For example:
--script=smb-enum-users,smb-enum-shares
Some scripts require arguments (for example, credentials, if they're exploiting an authenticated vulnerability). These can be given with the --script-args Nmap switch.
For example:
nmap -p 80 --script http-put --script-args http-put.url='/dav/shell.php',http-put.file='./shell.php'
Note that the arguments are separated by commas, and connected to the corresponding script with periods (i.e. <script-name>.<argument>)
Nmap scripts come with built-in help menus, which can be accessed using
nmap --script-help <script-name>
Searching for NSE Scripts
Ok, so we know how to use the scripts in Nmap, but we don't yet know how to find these scripts. We have two options for this, which should ideally be used in conjunction with each other. The first is the page on the Nmap website which contains a list of all official scripts.
The second is the local storage on your attacking machine. Nmap stores its scripts on Linux at /usr/share/nmap/scripts. All of the NSE scripts are stored in this directory by default
There are two ways to search for installed scripts. One is by using the /usr/share/nmap/scripts/script.db file.
Example:
grep "ftp" /usr/share/nmap/scripts/script.db
The second way to search for scripts is quite simply to use the ls command.
Example:
RPC Bind
Rpcbind is just a server that converts remote procedure call (RPC) program number into universal addresses. When an RPC service is started, it tells rpcbind the address at which it is listening and the RPC program number it’s prepared to serve.
In our case, port 111 is access to a network file system. Let’s use NMAP to enumerate this.
nmap -p 111 --script=nfs-ls,nfs-statfs,nfs-showmount MACHINE_IP
Now we see which mount is used.
Firewall Bypassing
We have already seen some techniques for bypassing firewalls (think stealth scans, along with NULL, FIN and Xmas scans). But there is also another trick. Your typical Windows host will, with its default firewall, block all ICMP packets.
So, we need a way to get around this configuration. Fortunately Nmap provides an option for this: -Pn, which tells Nmap to not bother pinging the host before scanning it.
Its worth to know that if you're already directly on the local network, Nmap can also use ARP requests to determine host activity.
There are a variety of other switches which Nmap considers useful for firewall evasion. More here.
- -f: Used to fragment the packets (i.e. split them into smaller pieces) making it less likely that the packets will be detected by a firewall or IDS.
- Alternative to –f change size of the packets: --mtu <number> ->This must be a multiple of 8.
- --scan-delay <time>ms:- used to add a delay between packets sent. This is very useful if the network is unstable
- --badsum:- this is used to generate in invalid checksum for packets. Any real TCP/IP stack would drop this packet, however, firewalls may potentially respond automatically.NMAP
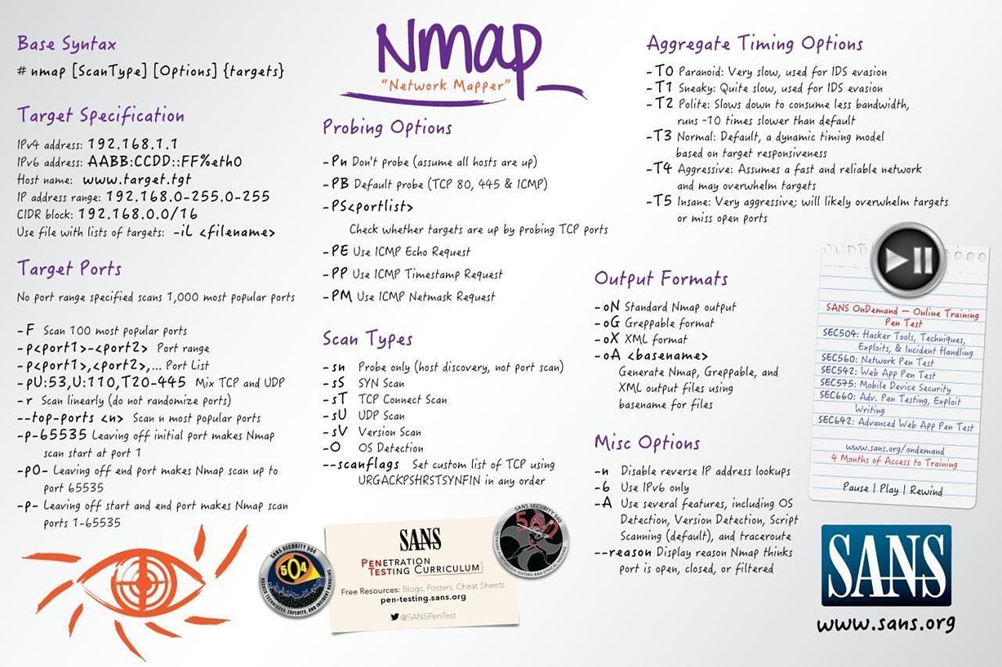
CheatSheet
WP Scan
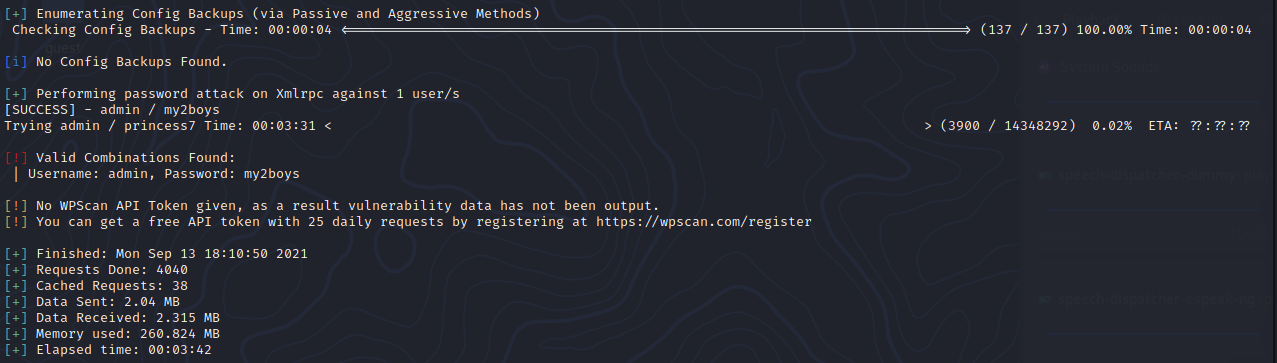
Sometimes your target has running a WordPress website running on their end. There is also a tool which allows you to scan such websites.
This is how you run an overall scan
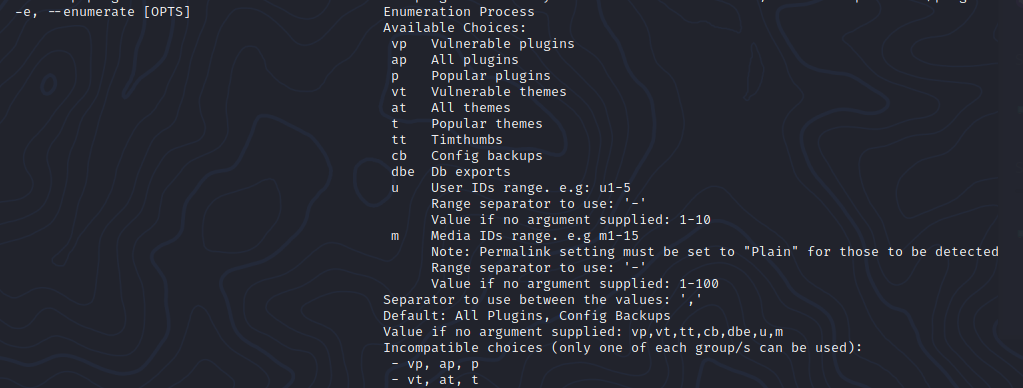
wpscan --url http://10.10.10.10/wordpress -e vp,u
When you found a username you can also start a Brute-Force attack on the Website:
wpscan --url http://10.10.10.10/wordpress --usernames admin --passwords /usr/share/wordlists/rockyou.txt --max-threads 50