# Splunk CTF
# Installation guide CentOS
At my workplace I'm managing a course for apprentices inside the organization. As we are working in the IT Security we are presenting how the work is done in several teams.
Splunk is an well known application and is needed everyday. Splunk is logging everything what happens in the network. In my course for the event we are playing a CTF with Splunk.
### Preparation and Information
CTF Scoreboard:
[https://github.com/splunk/SA-ctf\_scoreboard](https://github.com/splunk/SA-ctf_scoreboard)
Splunk Dataset:
[https://github.com/splunk/botsv1](https://github.com/splunk/botsv1)
Splunk installation:
[https://docs.splunk.com/Documentation/Splunk/7.0.3/Installation/InstallonLinux](https://docs.splunk.com/Documentation/Splunk/7.0.3/Installation/InstallonLinux)
Splunk Download:
[https://www.splunk.com/de\_de/download/splunk-enterprise.html](https://www.splunk.com/de_de/download/splunk-enterprise.html)
CentOS Download:
[https://www.centos.org/download/](https://www.centos.org/download/)
### Setting up VM
First download the CentOS 8 iso file so we can start setup a VM.
[http://mirror.init7.net/centos/8.4.2105/isos/x86\_64/CentOS-8.4.2105-x86\_64-dvd1.iso](http://mirror.init7.net/centos/8.4.2105/isos/x86_64/CentOS-8.4.2105-x86_64-dvd1.iso)
As soon you downloaded the iso we can start with VirtualBox.[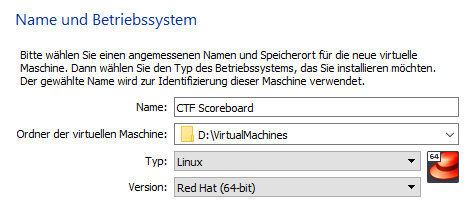](https://wiki.togogo.ch/uploads/images/gallery/2022-07/image.png)
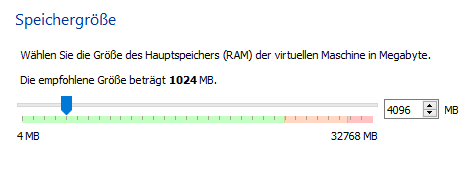
Set the RAM to ca. 4GB:
[](https://wiki.togogo.ch/uploads/images/gallery/2022-07/etXimage.png)
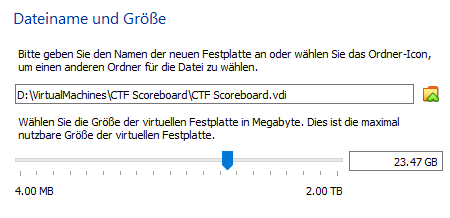
Create a dynamic VDI Disk with ca. 20-25 GB:
[](https://wiki.togogo.ch/uploads/images/gallery/2022-07/yiFimage.png)
Now the VM is ready to start but we need to specify some settings.
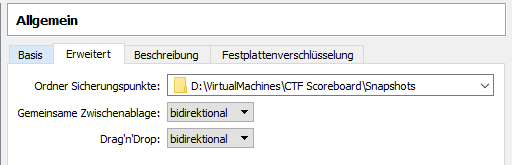
First we set the clipboard to bidirectional mode:
[](https://wiki.togogo.ch/uploads/images/gallery/2022-07/FDcimage.png)
Upscale the processor to minimum 2 cores:
[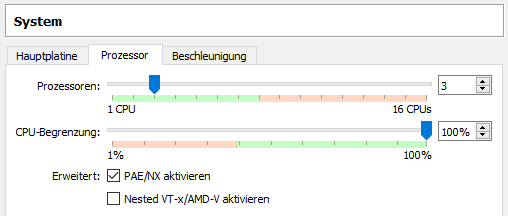](https://wiki.togogo.ch/uploads/images/gallery/2022-07/4dtimage.png)
Then change the network adapter to the Network bridge:
[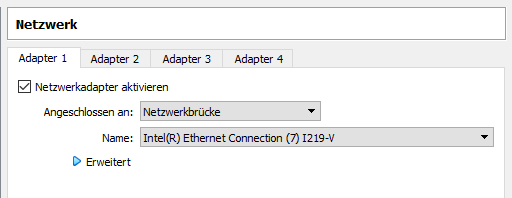](https://wiki.togogo.ch/uploads/images/gallery/2022-07/f20image.png)
And finally add the ISO File to the storage:
[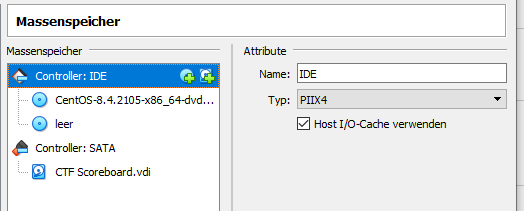](https://wiki.togogo.ch/uploads/images/gallery/2022-07/fOwimage.png)
Now we can start the machine and configure the setup.
### Setting up Operating System
After the VM started we choose the option "Install CentOS Linux 8"[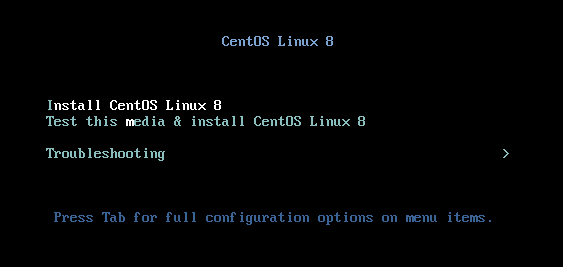](https://wiki.togogo.ch/uploads/images/gallery/2022-07/5bmimage.png)
First we land on a page where we need to specify some settings before we can go for the actual setup:[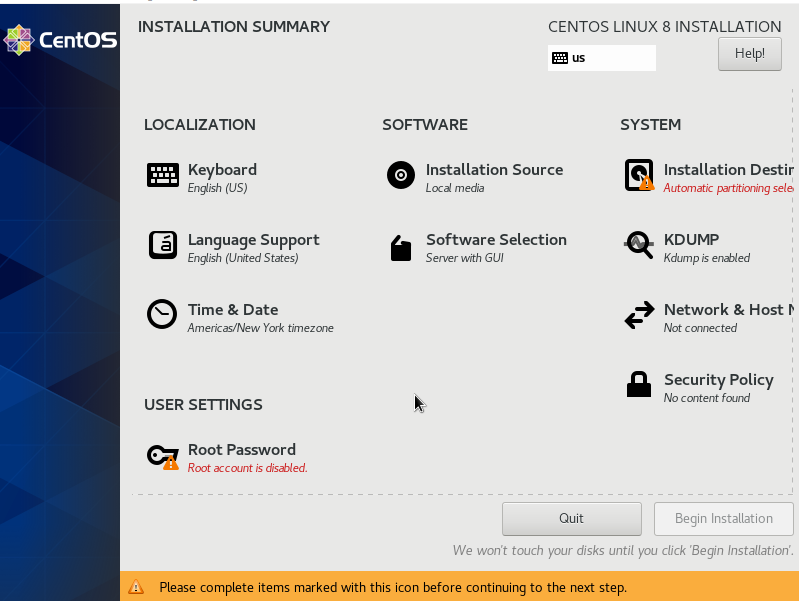](https://wiki.togogo.ch/uploads/images/gallery/2022-07/X2Dimage.png)
Set the Keyboard to Swissgerman.
Change the root password.
Define the partition to install the OS. Usually I choose automatic and use the whole disk.
At the end it should look like this:[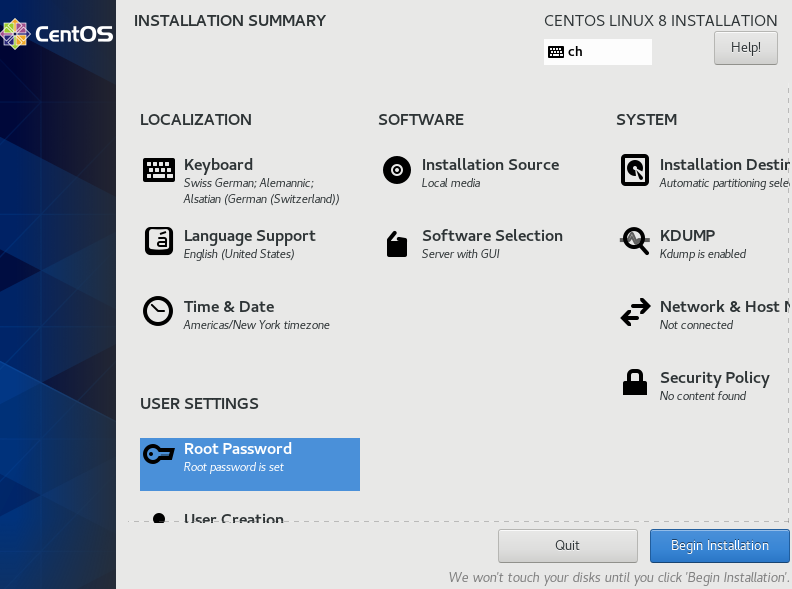](https://wiki.togogo.ch/uploads/images/gallery/2022-07/Vu0image.png)
Hit the button "Begin Installation" and the installation will start:[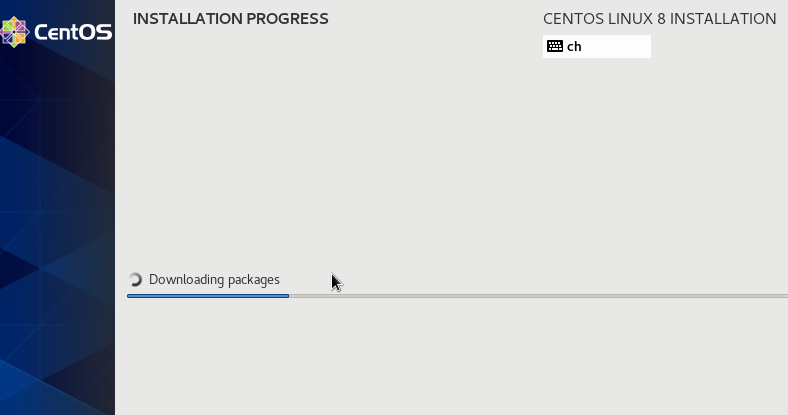](https://wiki.togogo.ch/uploads/images/gallery/2022-07/idJimage.png)
Once the installation is complete we need to perform a reboot. IMPORTANT: Remove the ISO file from the storage.[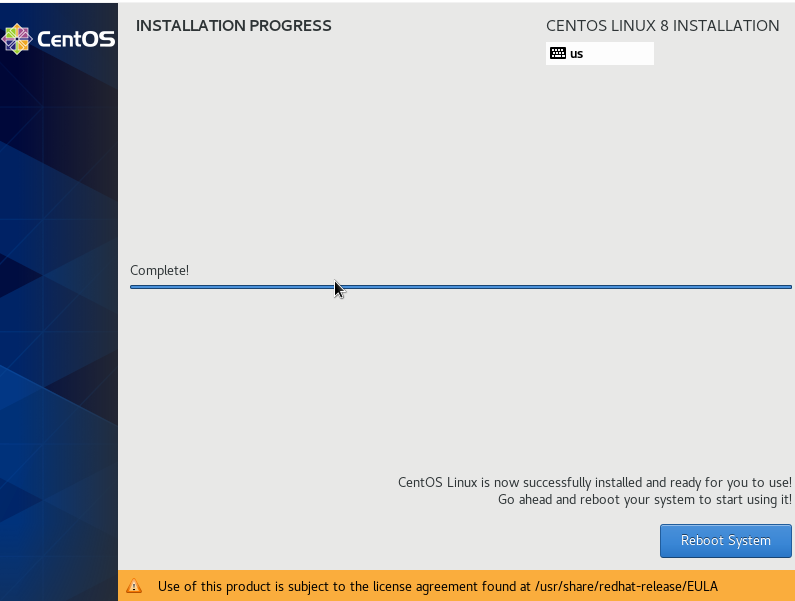](https://wiki.togogo.ch/uploads/images/gallery/2022-07/7climage.png)
Once rebooted set a user on the system and accept the EULA disclaimer:[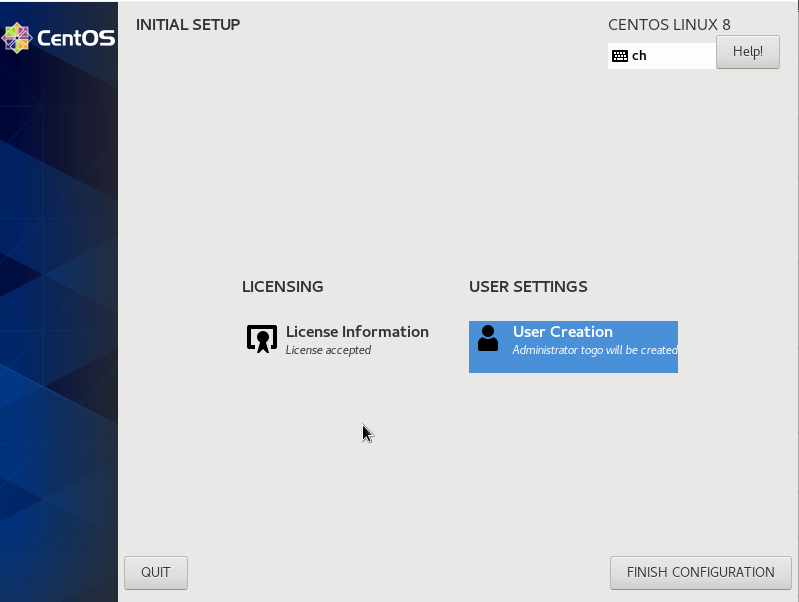](https://wiki.togogo.ch/uploads/images/gallery/2022-07/P11image.png)
Click on "Finish Configuration" and login with you recent created user account. Once you are logged in you are getting asked to define your system language, keyboard and some privacy settings.
After you set everything we are ready to use the CentOS system:[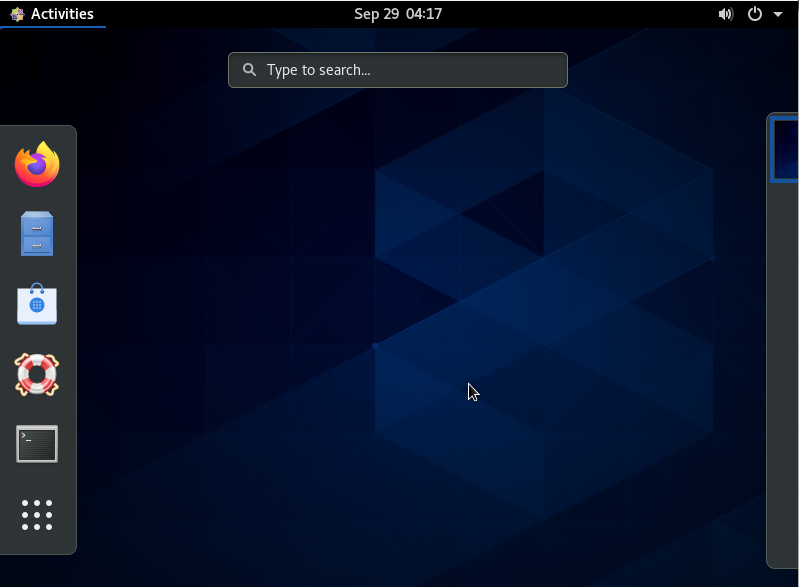](https://wiki.togogo.ch/uploads/images/gallery/2022-07/42Wimage.png)
Don't forget to turn on the Internet on top right corner by selecting "Choose wired".
# Splunk Installation
Before we install splunk we need to change some settings.
First we remove the "virbr0" network interface as it's useless for our project. Virbr0 is used for virtualization purposes and acts as a switch you can connect your guests and your host if you are virtualizing.[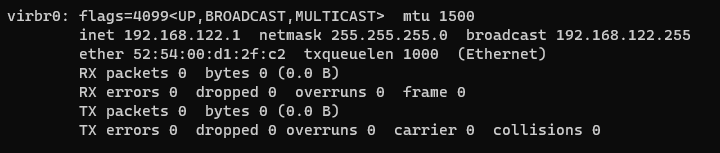](https://wiki.togogo.ch/uploads/images/gallery/2022-07/qAuimage.png)
To do this enter following commands:
`systemctl stop libvirtd.service`
`systemctl status libvirtd.service -> make sure service is innactive`
`systemctl disable libvirtd.service`
`reboot`
After reboot the interface is removed.[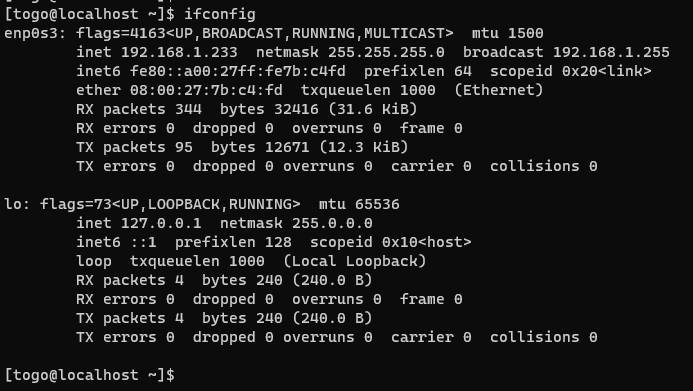](https://wiki.togogo.ch/uploads/images/gallery/2022-07/Svcimage.png)
### Install Splunk
Now we are one step closer to the Splunk CTF. First we need to install Splunk Enterprise.
Splunk Enterprise is free for 60 days and afterwards you'll need to provide a license anyway we download Splunk enterprise from the homepage [https://www.splunk.com/de\_de/download/splunk-enterprise.html](https://www.splunk.com/de_de/download/splunk-enterprise.html)
Probably you need to log in yourself to have access. [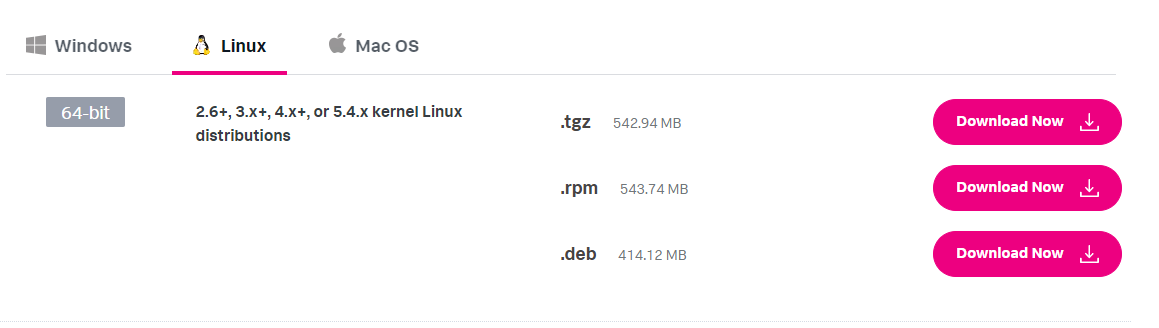](https://wiki.togogo.ch/uploads/images/gallery/2022-07/E1Eimage.png)
I followed the guide of Splunk [https://docs.splunk.com/Documentation/Splunk/7.0.3/Installation/InstallonLinux](https://docs.splunk.com/Documentation/Splunk/7.0.3/Installation/InstallonLinux)
We are downloading the RPM package. Once downloaded we can start with the installation.
[](https://wiki.togogo.ch/uploads/images/gallery/2022-07/obhimage.png)
Confirm that the RPM package you want is available locally on the target host.
Verify that the Splunk Enterprise user account that will run the Splunk services can read and access the file.
If needed, change permissions on the file.
`chmod 744 splunk_splunk-8.2.2.1-ae6821b7c64b-linux-2.6-x86_64.rpm`
[](https://wiki.togogo.ch/uploads/images/gallery/2022-07/cEjimage.png)
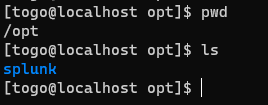
Invoke the following command to install the Splunk Enterprise RPM in the default directory /opt/splunk.
`rpm -i splunk-8.2.2.1-ae6821b7c64b-linux-2.6-x86_64.rpm`
[](https://wiki.togogo.ch/uploads/images/gallery/2022-07/dDXimage.png)
[](https://wiki.togogo.ch/uploads/images/gallery/2022-07/G00image.png)
Now as Splunk is installed we need to set the admin password.
Go to the directory: /opt/splunk/bin
[](https://wiki.togogo.ch/uploads/images/gallery/2022-07/LLTimage.png)
Afterwards you are prompted to accept the license. Accept it and go on.
Choose and administrator username:[](https://wiki.togogo.ch/uploads/images/gallery/2022-07/5b8image.png)
Provide a password and splunk will get started.[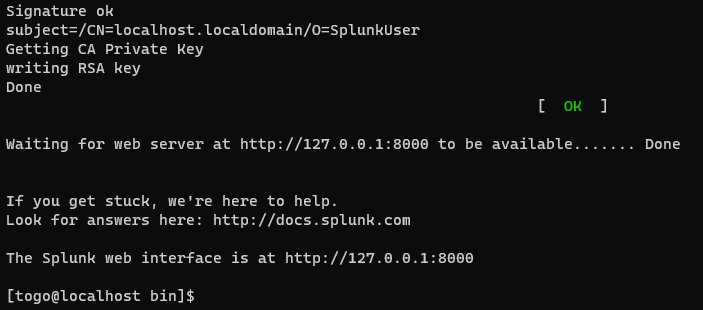](https://wiki.togogo.ch/uploads/images/gallery/2022-07/i1wimage.png)
By checking on the browser in the CentOS VM localhost:8000 we should see a Splunk login screen:[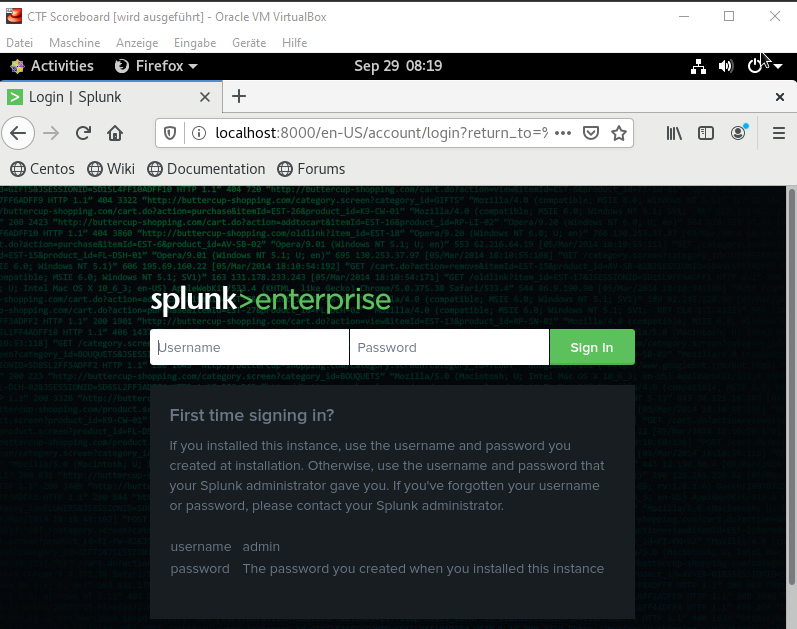](https://wiki.togogo.ch/uploads/images/gallery/2022-07/pfKimage.png)
# Configure Firewall & Splunk
### Open Firewall
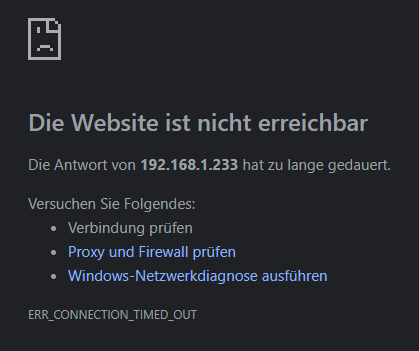
When we try to access the login via internal network we won't be able to establish a connection.
[](https://wiki.togogo.ch/uploads/images/gallery/2022-07/mA7image.png)
[](https://wiki.togogo.ch/uploads/images/gallery/2022-07/Oeeimage.png)
The problem is that our machine is refusing connections from outside via port 8000. We need to open the port on the firewall.
The guide how to change firewall rules can be found here: [https://www.digitalocean.com/community/tutorials/how-to-set-up-a-firewall-using-firewalld-on-centos-8-de](https://www.digitalocean.com/community/tutorials/how-to-set-up-a-firewall-using-firewalld-on-centos-8-de)
With a simple oneliner we have opened the port:
`sudo firewall-cmd --zone=public --permanent --add-port=8000/tcp`
That's it now we need to reboot once and the port is accessible via the network.[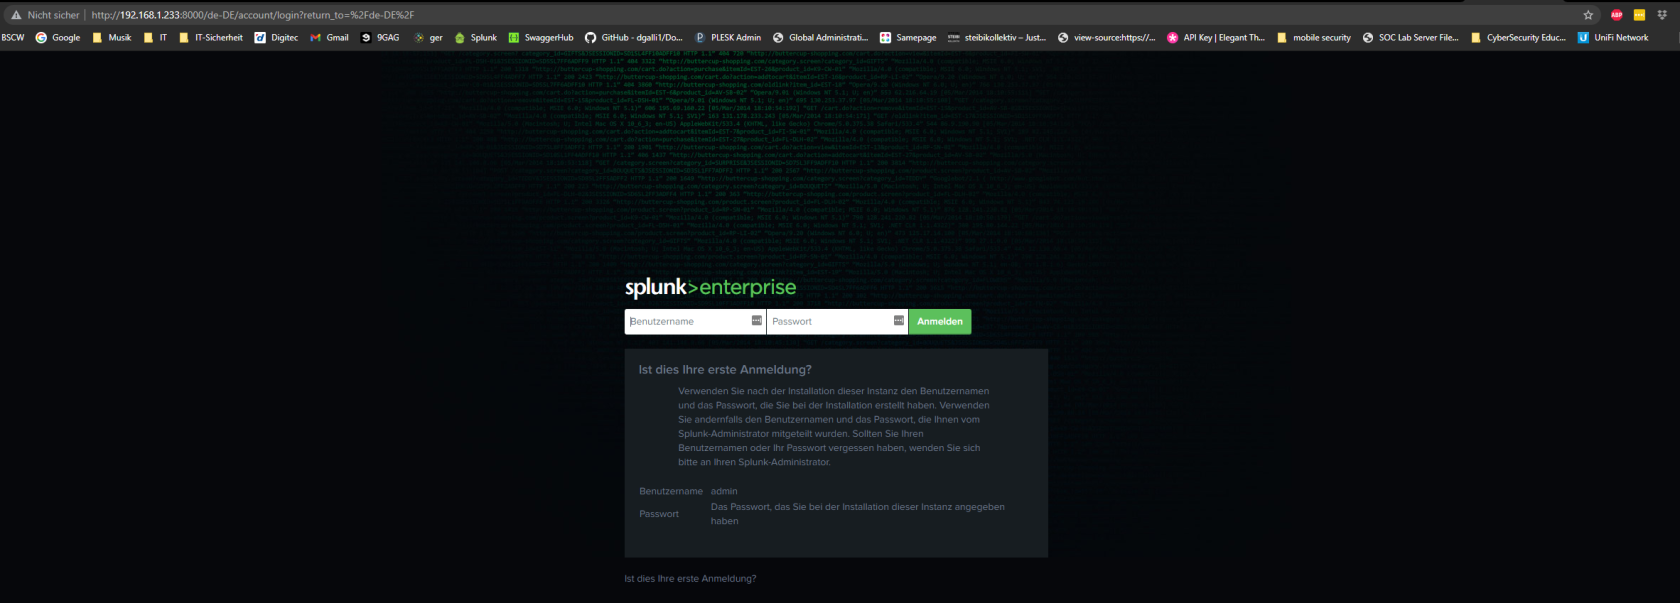](https://wiki.togogo.ch/uploads/images/gallery/2022-07/Dxjimage.png)
### Configure Splunk
Now as Splunk is running we can log in with the defined credentials.[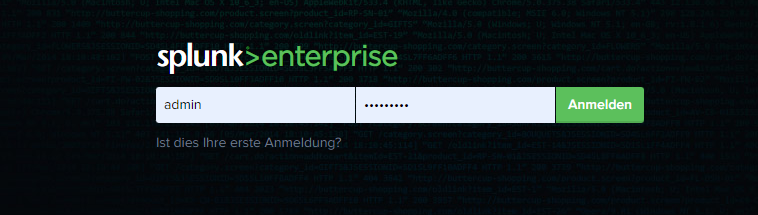](https://wiki.togogo.ch/uploads/images/gallery/2022-07/UzNimage.png)
Next step we set the correct timezone and enable HTTPS.
For that we go into the settings below the Administrator Tab.
[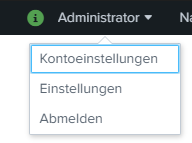](https://wiki.togogo.ch/uploads/images/gallery/2022-07/twiimage.png)
[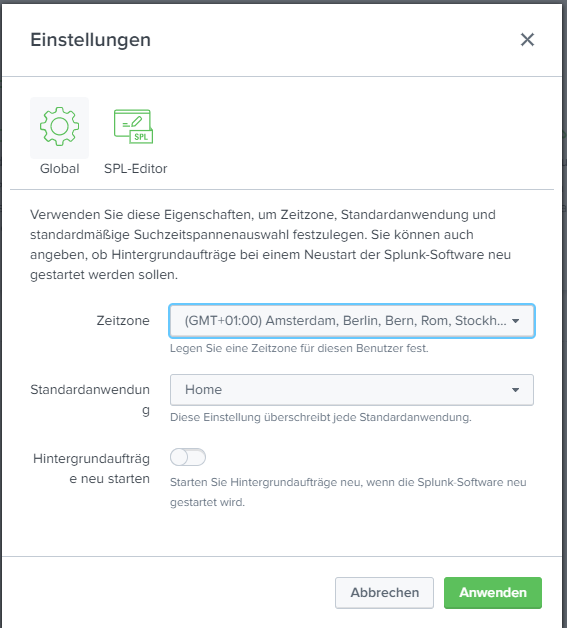](https://wiki.togogo.ch/uploads/images/gallery/2022-07/8c4image.png)
Easy!
Next thing to do is enable HTTPS.
To access the server setting we access the Setting tab and go to Server-Settings[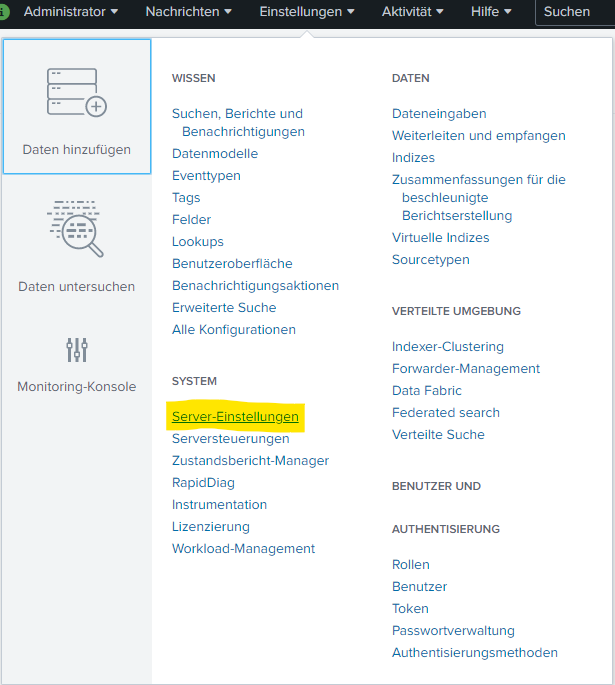](https://wiki.togogo.ch/uploads/images/gallery/2022-07/Jbqimage.png)
Then we access the general settings[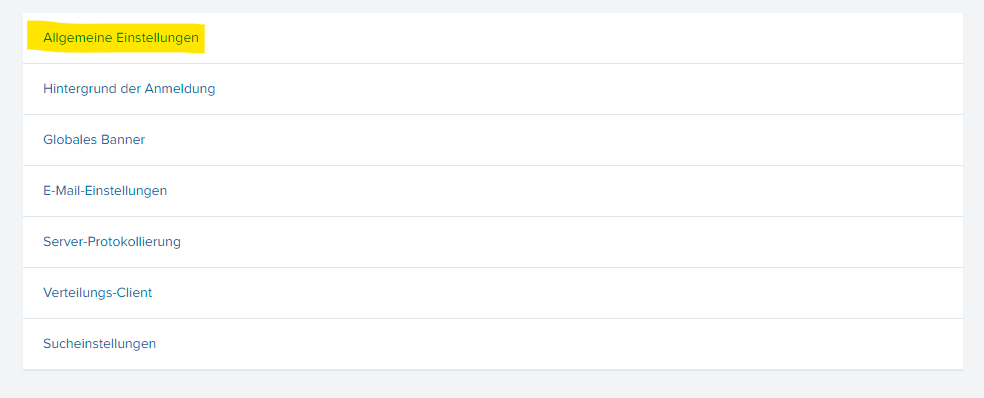](https://wiki.togogo.ch/uploads/images/gallery/2022-07/ihgimage.png)
In the general setting we choose "enable HTTPS in Splunk Web":[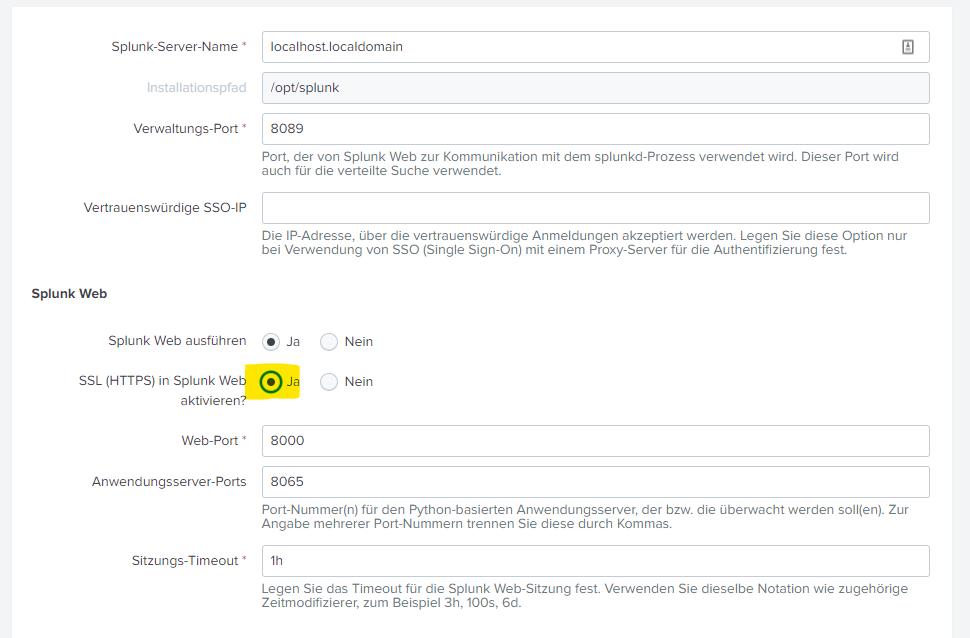](https://wiki.togogo.ch/uploads/images/gallery/2022-07/J2dimage.png)
After the HTTPS box is checked we need to perform a restart of the Splunk service. To initiate a restart we go to the "Settings" tab and choose Server-Control:
[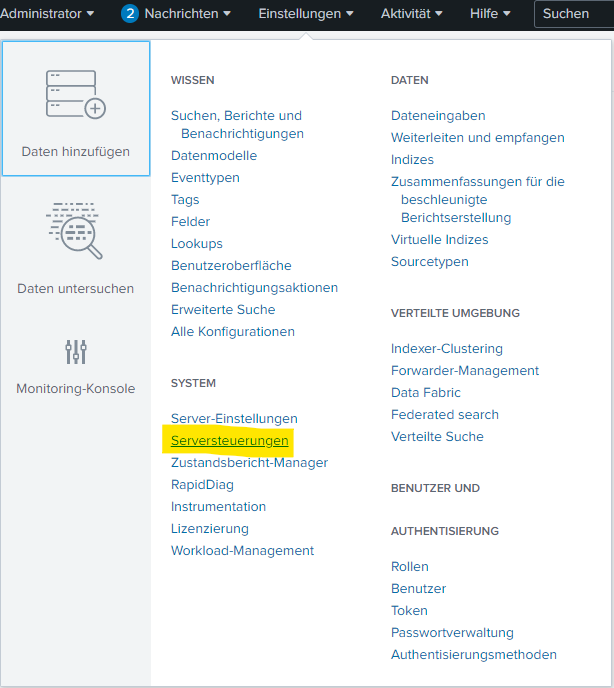](https://wiki.togogo.ch/uploads/images/gallery/2022-07/E1oimage.png)
In here we are able to restart the service:[](https://wiki.togogo.ch/uploads/images/gallery/2022-07/1f5image.png)
You'll get asked if you really want to restart. Press OK
[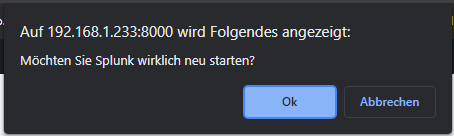](https://wiki.togogo.ch/uploads/images/gallery/2022-07/4AAimage.png)
[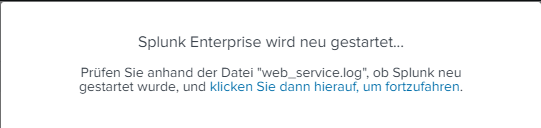](https://wiki.togogo.ch/uploads/images/gallery/2022-07/wCwimage.png)
Click on the URL and you'll get redirected to the HTTPS login
[](https://wiki.togogo.ch/uploads/images/gallery/2022-07/3AIimage.png)
Now we are going back to the shell and set the $SPLUNK\_HOME environment variable.
`export SPLUNK_HOME=/opt/splunk`
[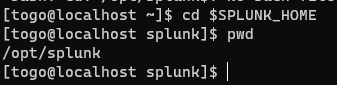](https://wiki.togogo.ch/uploads/images/gallery/2022-07/Q2wimage.png)
### Install Apps and Addons
Download following Apps:
[Lookup File Editor app](https://splunkbase.splunk.com/app/1724/) (Note: Tested with version 3.0.3)
[Parallel Coordinates Custom Visualization](https://splunkbase.splunk.com/app/3137/) (Note: Tested with version 1.2.0)
[Simple Timeseries Custom Visualization](https://splunkbase.splunk.com/app/3436/) (Note: Tested with version 1.0)
[Timeline Custom Visualization](https://splunkbase.splunk.com/app/3120/) (Note: Tested with version 1.2.0)
[](https://wiki.togogo.ch/uploads/images/gallery/2022-07/rYsimage.png)
All apps are zipped in tgz. We can add them into Splunk as following:
On the Splunk landing page there are the current apps listed. Top right corner is a little "Settings-Wheel"[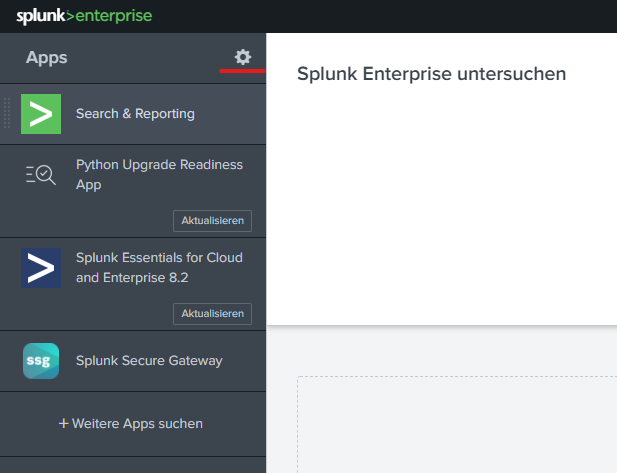](https://wiki.togogo.ch/uploads/images/gallery/2022-07/6Krimage.png)
We are getting redirected to the main Apps and Addons page. Top right corner we are able to install apps of a file:[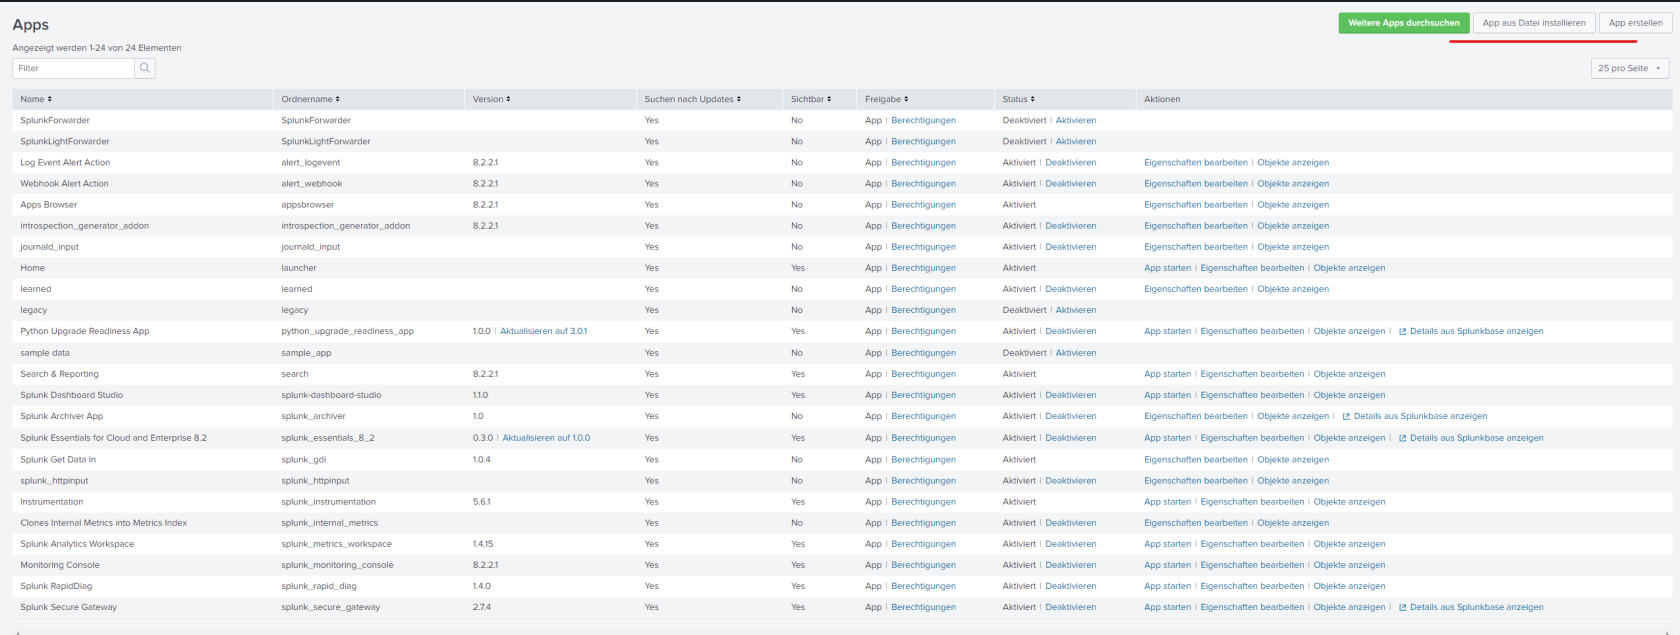](https://wiki.togogo.ch/uploads/images/gallery/2022-07/CNjimage.png)
To install an app we click on the button "install app out of file":[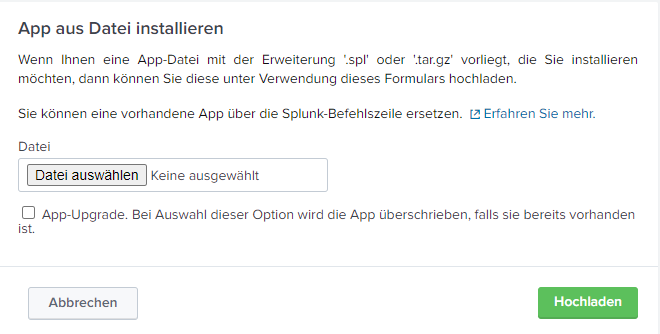](https://wiki.togogo.ch/uploads/images/gallery/2022-07/0m4image.png)
Install all apps and restart the service.
After the restart we see on the landing page the newly added apps.
[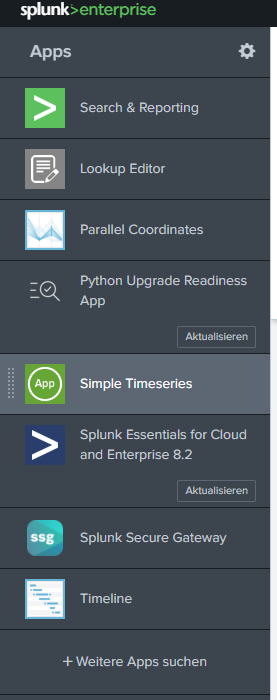](https://wiki.togogo.ch/uploads/images/gallery/2022-07/2w8image.png)
### Install CTF Scoreboard
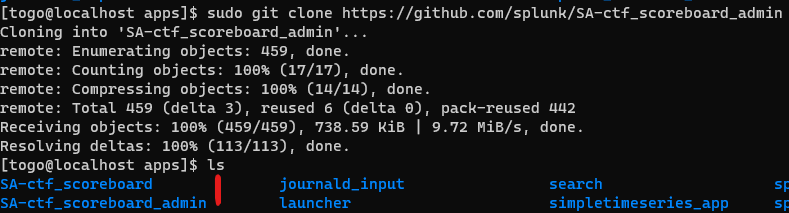
Now we install the CTF Scoreboard. Enter the directory of the apps and clone the repository:
> cd $SPLUNK\_HOME/etc/apps
>
> sudo git clone [https://github.com/splunk/SA-ctf\_scoreboard](https://github.com/splunk/SA-ctf_scoreboard)
[](https://wiki.togogo.ch/uploads/images/gallery/2022-07/znDimage.png)
sudo git clone [https://github.com/splunk/SA-ctf\_scoreboard\_admin](https://github.com/splunk/SA-ctf_scoreboard_admin)
After you installed the Scoreboards we need to restart the service
> sudo $SPLUNK\_HOME/bin/splunk restart
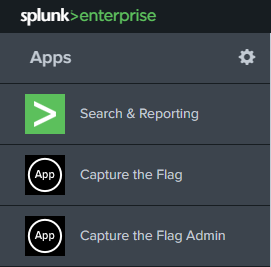
Now we should see the Apps on the landing page
[](https://wiki.togogo.ch/uploads/images/gallery/2022-07/CDaimage.png)
Next we create the log folder for the scoreboard:
`sudo mkdir $SPLUNK_HOME/var/log/scoreboard`
#### Create CTF Answers service account cabanaboy
By convention this user is called cabanaboy because that’s what any rational person would pick while sitting next to Ryan Kovar
Pick a good strong password, and record it. You will need it again soon. The good news is that it does not need to be easily memorized by a human.
Assign the cabanaboy user to role ctf\_answers\_service
This can all be accomplished from the command line as follows:
`sudo $SPLUNK_HOME/bin/splunk add user cabanaboy -password -role ctf_answers_service -auth admin:`
#### Configure Scoreboard controller
Access the log directory
`cd $SPLUNK_HOME/etc/apps/SA-ctf_scoreboard/appserver/controllers`
`cp scoreboard_controller.config.example scoreboard_controller.config`
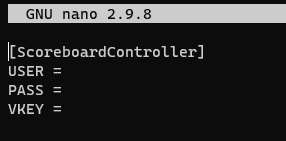
Edit scoreboard\_controller.config to reflect the following:
- The CTF Answers service account username (probably cabanaboy)
- The CTF Answers service account password you chose above
- A vkey parameter which should just be a random string, 10-20 characters in length
[](https://wiki.togogo.ch/uploads/images/gallery/2022-07/D1Simage.png)
User: cabanaboy
Pass: \*\*\*\*\*\*\*\*\*\*\*\*
VKey: randomstringbytogo
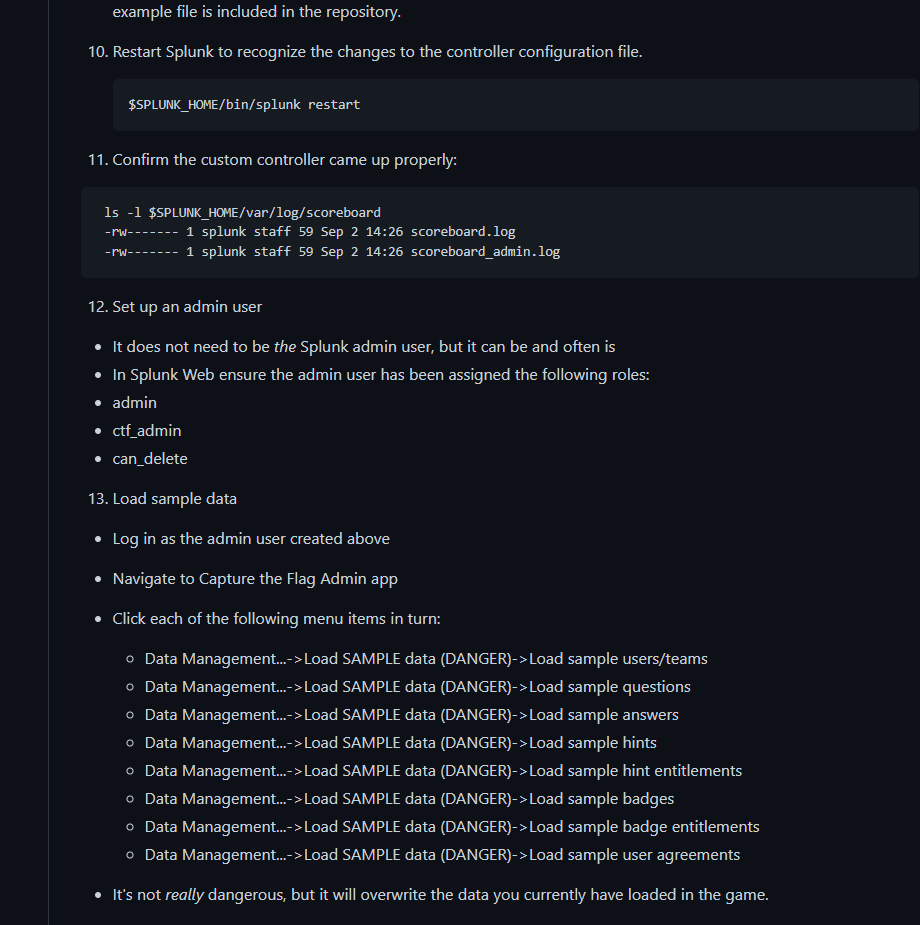
neeed to write from here:
[](https://wiki.togogo.ch/uploads/images/gallery/2022-07/jLDimage.png)
[https://run-as-root.com/2021/06/08/splunk-botsv3-install-and-configuration/](https://run-as-root.com/2021/06/08/splunk-botsv3-install-and-configuration/)