# Installation guide CentOS
At my workplace I'm managing a course for apprentices inside the organization. As we are working in the IT Security we are presenting how the work is done in several teams.
Splunk is an well known application and is needed everyday. Splunk is logging everything what happens in the network. In my course for the event we are playing a CTF with Splunk.
### Preparation and Information
CTF Scoreboard:
[https://github.com/splunk/SA-ctf\_scoreboard](https://github.com/splunk/SA-ctf_scoreboard)
Splunk Dataset:
[https://github.com/splunk/botsv1](https://github.com/splunk/botsv1)
Splunk installation:
[https://docs.splunk.com/Documentation/Splunk/7.0.3/Installation/InstallonLinux](https://docs.splunk.com/Documentation/Splunk/7.0.3/Installation/InstallonLinux)
Splunk Download:
[https://www.splunk.com/de\_de/download/splunk-enterprise.html](https://www.splunk.com/de_de/download/splunk-enterprise.html)
CentOS Download:
[https://www.centos.org/download/](https://www.centos.org/download/)
### Setting up VM
First download the CentOS 8 iso file so we can start setup a VM.
[http://mirror.init7.net/centos/8.4.2105/isos/x86\_64/CentOS-8.4.2105-x86\_64-dvd1.iso](http://mirror.init7.net/centos/8.4.2105/isos/x86_64/CentOS-8.4.2105-x86_64-dvd1.iso)
As soon you downloaded the iso we can start with VirtualBox.[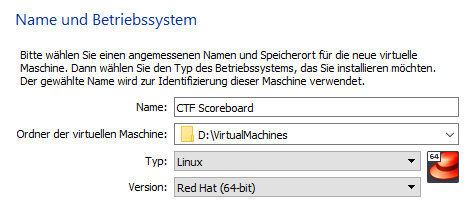](https://wiki.togogo.ch/uploads/images/gallery/2022-07/image.png)
Set the RAM to ca. 4GB:
[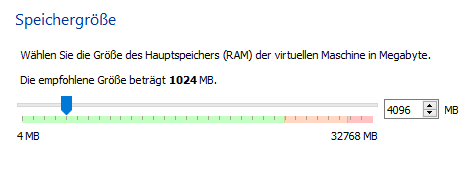](https://wiki.togogo.ch/uploads/images/gallery/2022-07/etXimage.png)
Create a dynamic VDI Disk with ca. 20-25 GB:
[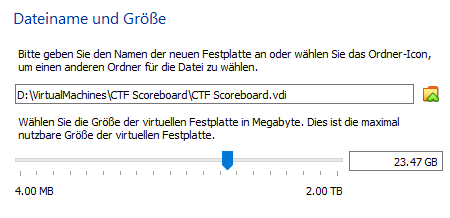](https://wiki.togogo.ch/uploads/images/gallery/2022-07/yiFimage.png)
Now the VM is ready to start but we need to specify some settings.
First we set the clipboard to bidirectional mode:
[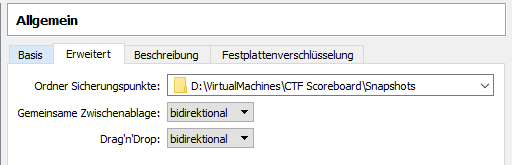](https://wiki.togogo.ch/uploads/images/gallery/2022-07/FDcimage.png)
Upscale the processor to minimum 2 cores:
[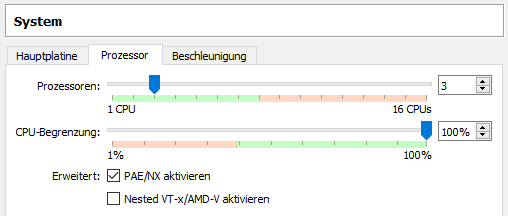](https://wiki.togogo.ch/uploads/images/gallery/2022-07/4dtimage.png)
Then change the network adapter to the Network bridge:
[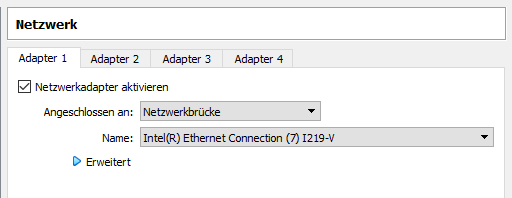](https://wiki.togogo.ch/uploads/images/gallery/2022-07/f20image.png)
And finally add the ISO File to the storage:
[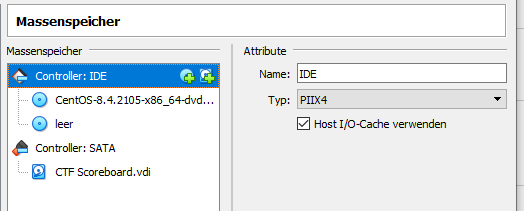](https://wiki.togogo.ch/uploads/images/gallery/2022-07/fOwimage.png)
Now we can start the machine and configure the setup.
### Setting up Operating System
After the VM started we choose the option "Install CentOS Linux 8"[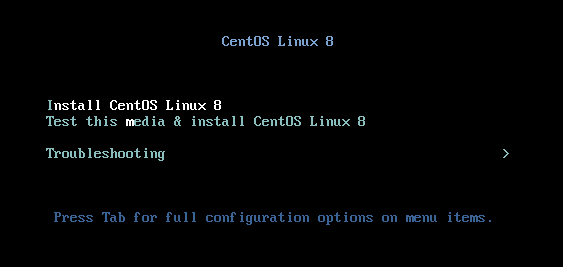](https://wiki.togogo.ch/uploads/images/gallery/2022-07/5bmimage.png)
First we land on a page where we need to specify some settings before we can go for the actual setup:[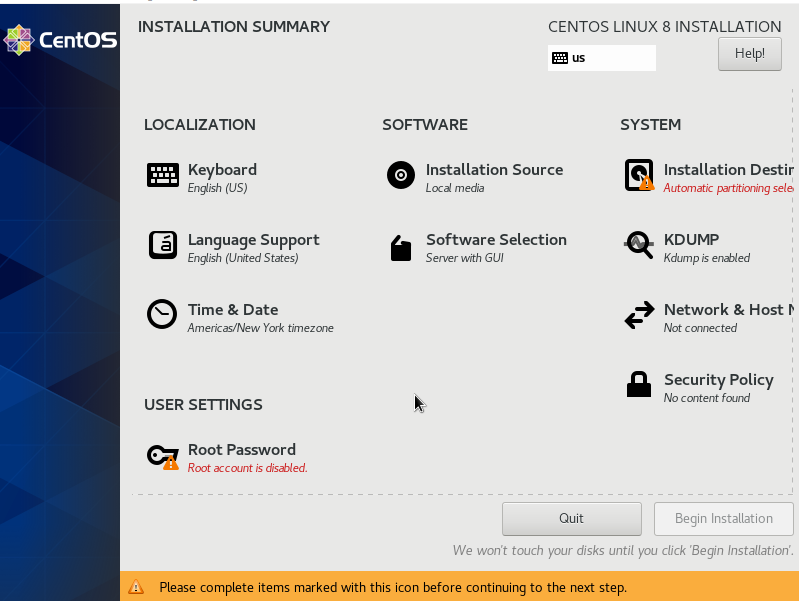](https://wiki.togogo.ch/uploads/images/gallery/2022-07/X2Dimage.png)
Set the Keyboard to Swissgerman.
Change the root password.
Define the partition to install the OS. Usually I choose automatic and use the whole disk.
At the end it should look like this:[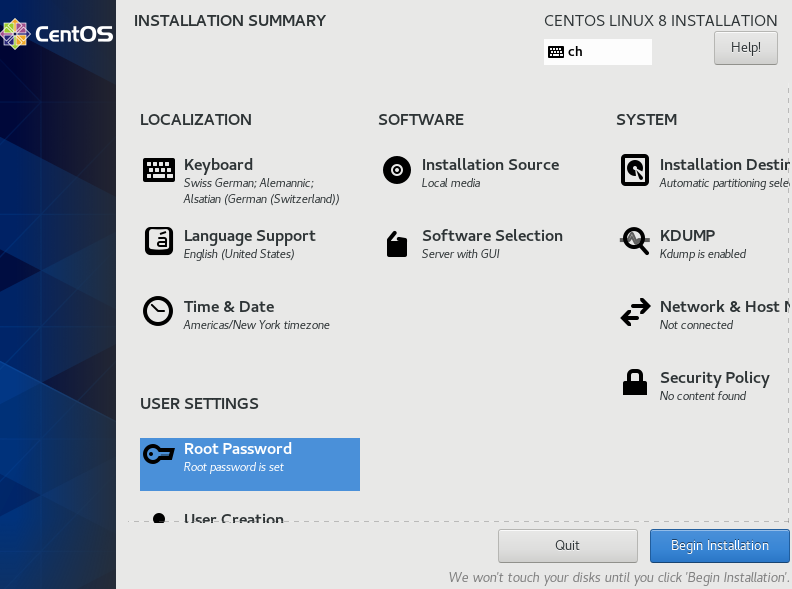](https://wiki.togogo.ch/uploads/images/gallery/2022-07/Vu0image.png)
Hit the button "Begin Installation" and the installation will start:[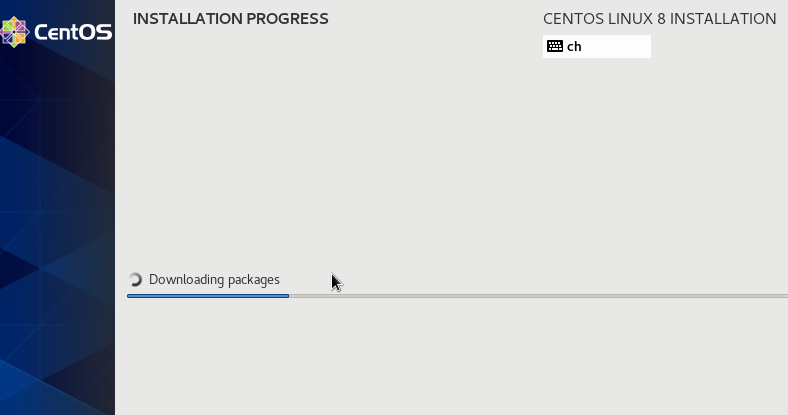](https://wiki.togogo.ch/uploads/images/gallery/2022-07/idJimage.png)
Once the installation is complete we need to perform a reboot. IMPORTANT: Remove the ISO file from the storage.[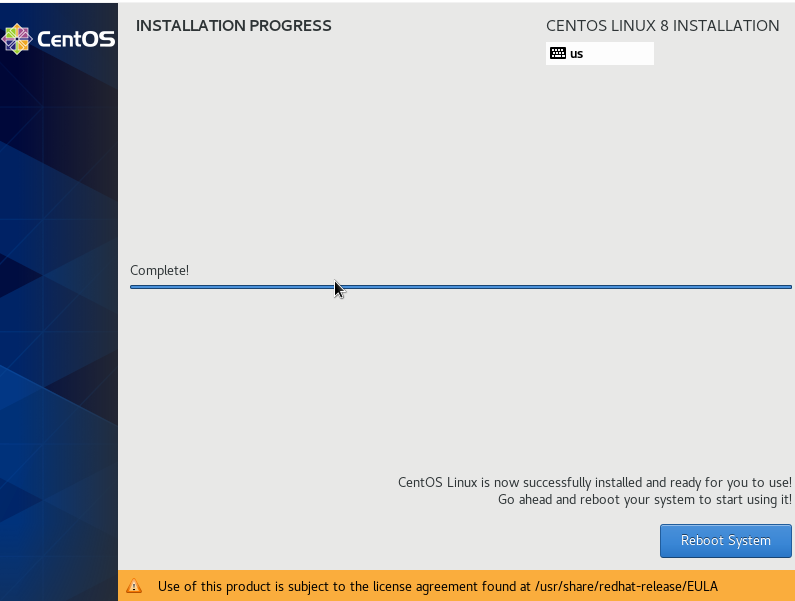](https://wiki.togogo.ch/uploads/images/gallery/2022-07/7climage.png)
Once rebooted set a user on the system and accept the EULA disclaimer:[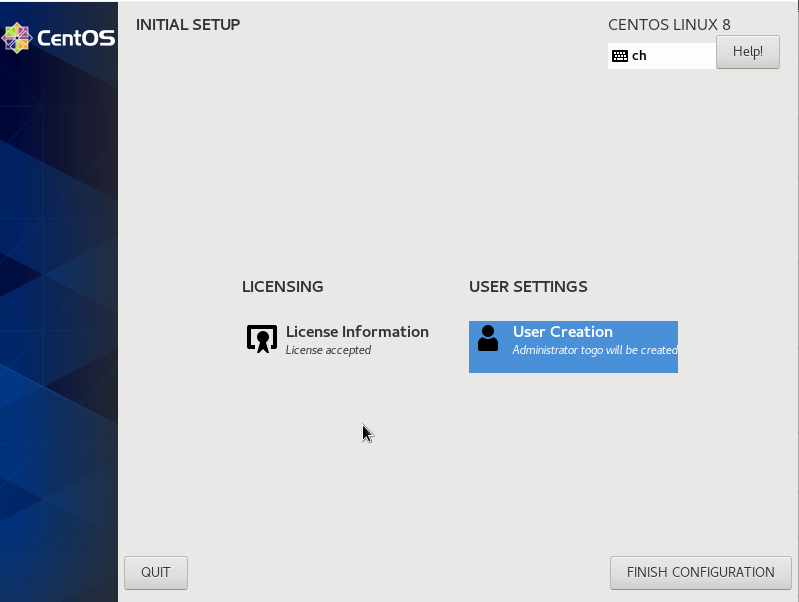](https://wiki.togogo.ch/uploads/images/gallery/2022-07/P11image.png)
Click on "Finish Configuration" and login with you recent created user account. Once you are logged in you are getting asked to define your system language, keyboard and some privacy settings.
After you set everything we are ready to use the CentOS system:[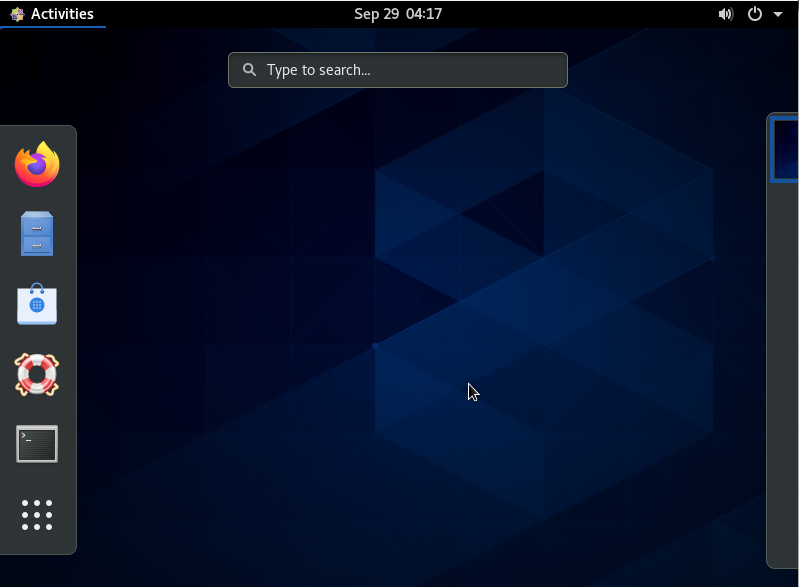](https://wiki.togogo.ch/uploads/images/gallery/2022-07/42Wimage.png)
Don't forget to turn on the Internet on top right corner by selecting "Choose wired".